Showing posts with label craft kit. Show all posts

Monday, 17 September 2012

Monday Make – Fish Birthday Card

sep16 fish birthday card
Recently I’ve spent quite a lot of time on paperwork and planning the Christmas craft fayre, so thought it was about time I made something!  This fun birthday card didn't take long to make and features my copperband butterfly fish illustration.
To make this card you will need:
1. Cut out the butterfly fish and ‘Happy Birthday’ message from the collage sheet.  Cut a piece of patterned paper slightly smaller than the card – so that it lines up with the fold of the card and there is a border along the other 3 sides.
2.  Use the corner punch to make 2 rounded corners on the patterned paper, then glue to the card.  If you don’t have a punch you could use something round as a template (eg. a small coin) and cut the corners by hand.
3. Mount the birthday message on white card, then stick the message and fish to the card with the foam pads for a 3D effect.
4.  Glue the gems onto the card so they look like bubbles coming out of the fish’s mouth.  Instead of gems you could also try using sequins or beads.
Now you have one finished fish card!
You could make similar cards with some of my other fish too – why not try a clown fish card or cardinal tetra?!

Tuesday, 10 April 2012

New! Steampunk Cardmaking Kit

This cardmaking kit is the latest addition to my selection of Steampunk craft supplies.  It contains card blanks, envelopes, backing papers, motifs and border strips to make at least 5 unique cards.
The cards in this set are made from 100% post industrial waste fibres, they are acid, lignin and chlorine free and come with brown Kraft envelopes.  I have included 5 different coloured cards (sandstone, suede, tuscan brown, ash and dark grey) to coordinate with the backing papers and motifs.
8 sheets of A5 backing paper are included in the kit - from spots to cogs, keys and clock hands.  Combined with the border strips and motifs they would be great for making men's Birthday cards, gift tags and more!
If you would like to make your own unique Steampunk cards this kit is now available to buy from my Etsy shop: www.hfcSupplies.etsy.com

Wednesday, 15 February 2012

Release of new Cupcakes and Roses craft supplies

My new range of Cupcakes and Roses craft supplies is now ready for release!  The first product I am launching is this cardmaking kit...
This pretty kit contains card blanks, envelopes, papers, motifs and embellishments to make at least 5 cards.  With a bright, spring feel this kit would be great for making cards for a range of occassions; birthdays, thank you, get well soon, Mother's day and more!
I have designed all of the papers and motifs in this kit using a combination of pencil, pen, watercolours and digital art.  There are 5 backing papers which feature spots, stripes, tiny flowers and a rose pattern inspired by vintage teasets and floral fabrics.  Also included are border strips and motifs with cute cupcakes and a selection of messages.

For a little inspiration on the many cards and gift tags you could make with the kit here is a simple card I made...
I used a cream linen textured card blank, 2 of the spotty backing papers layered with a 'Happy Birthday' border strip, raspberry cupcake motif and bright pink ribbon.

This kit is available to buy from my Etsy supplies shop here.

Look out for the next release tomorrow!

Wednesday, 25 January 2012

Cupcakes and Roses

Last week I shared a sneak peak of my latest project so I thought I'd post an update...
I have been designing backing papers and motifs for a new cardmaking kit with a cupcakes and roses theme.  Each design starts as a hand drawn image - made from a combination of pen, watercolour pencils and watercolour paint.  I scanned these and finished them digitally...
The papers are all designed now and I am finalising the other elements to the kit; card blanks and embellishments.  I'm really pleased with how this kit is going and looking forward to when it's all finished and ready to list in my shop! :)

Thursday, 21 July 2011

Paper Rose Card and Tag Kit ~ Tutorial

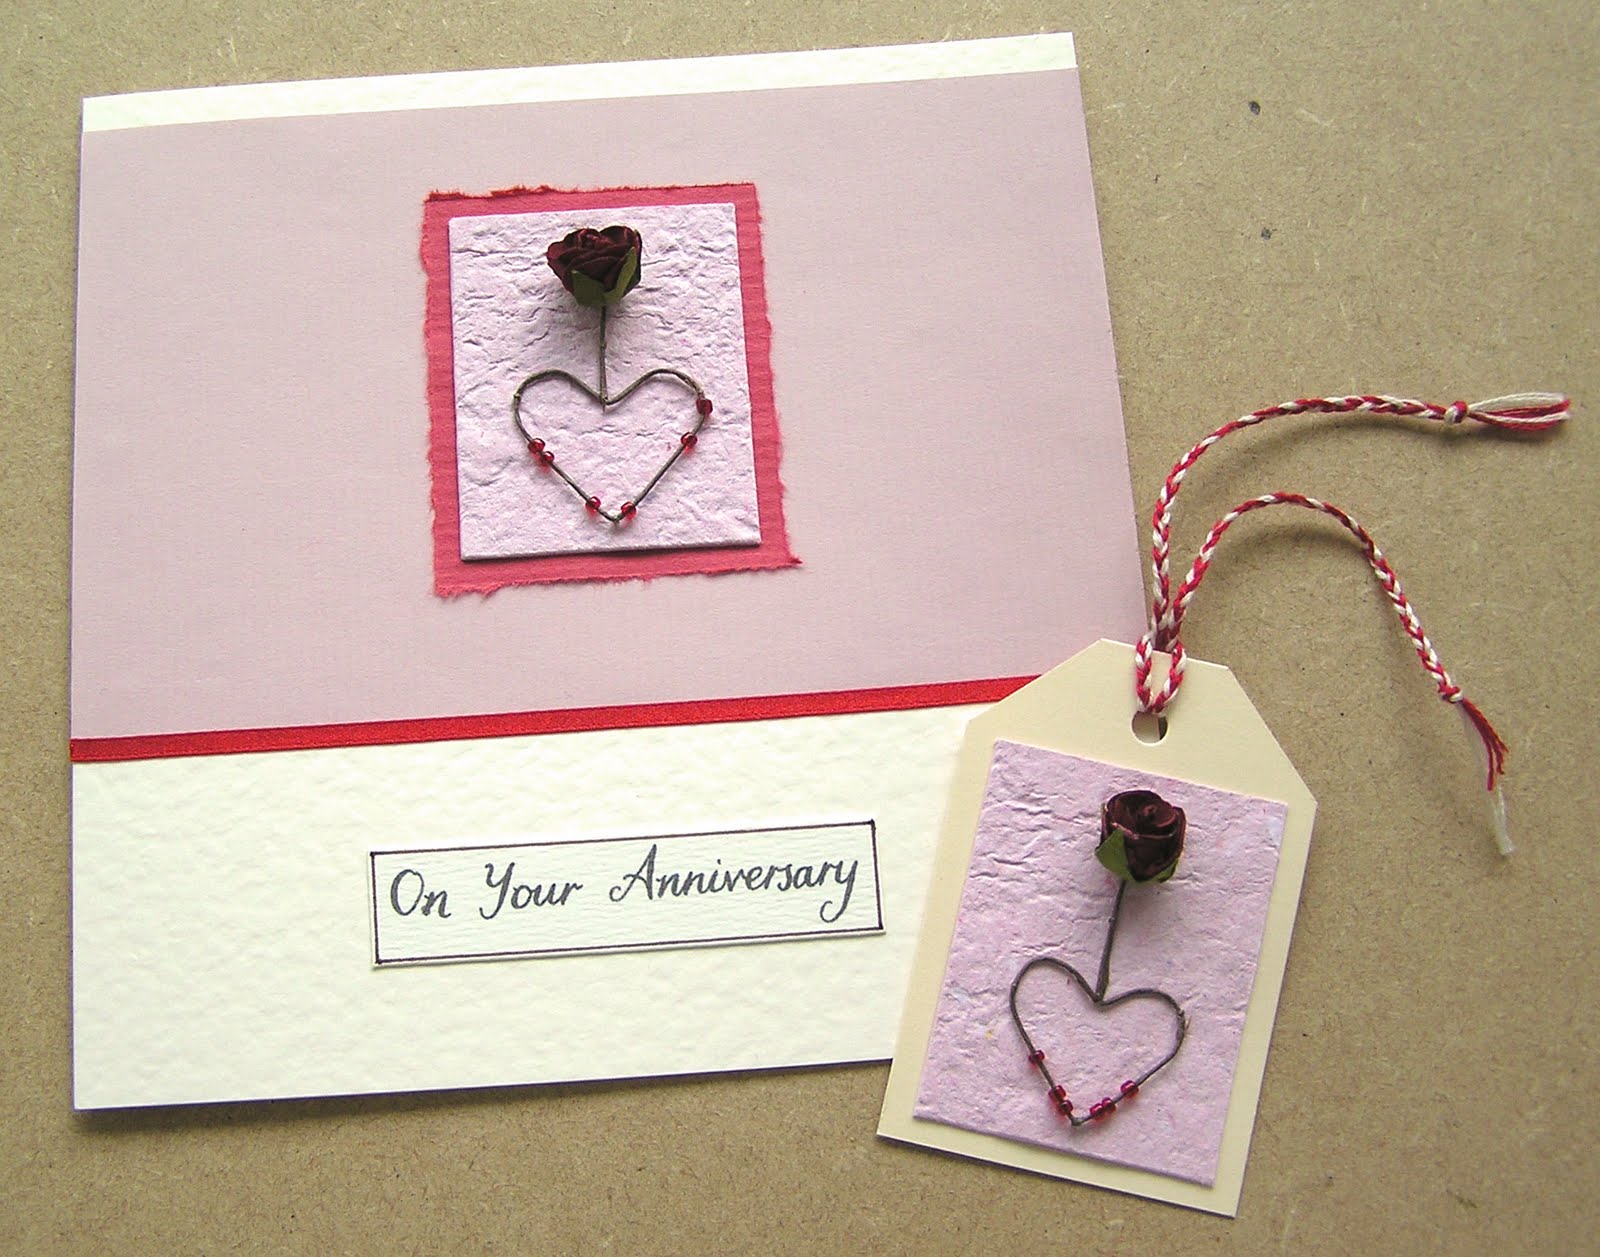
Here's the tutorial for Kit #002 - to make an Anniversary or Wedding card and matching gift tag. (Craft kits are available to buy in my Etsy supplies shop.)

The kit contains... a card blank, envelope, paper, card, 2 paper roses, ribbon, beads and thread. (The handmade paper included is made by my own hands!)  You will need basic materials to complete the kit - scissors, glue, a needle and thread.  I like to also use a craft knife, ruler and different glues; glue stick, pva craft glue and double sided tape.
To make the card...
1. The first step is to bend the wire stem of the rose into a heart shape.  You can use either your hands or pliers - whichever you find easiest.
Use the handmade paper backing as a guide as to where the top of the heart should be, bend the wire here.  Then bend the remaining length in half.
Shape each half into a heart shape.  Then thread on the beads - you may need to open the heart out a bit again but it's easier to bend closed again than to thread the beads on first.
2. To attach the flower to the backing paper...
Lay the flower where you want it to be on the paper and with a needle or pin make 4 small holes (as shown by the blue dots on the photo).
Using a thread that blends in with the colour of the stem, sew up through each hole, over the stem and back down through the same hole again.  Secure the thread on the back.  This will hold the flower in place and stop the beads from falling off.
3. Mount the handmade paper and flower.  You could cut the red paper, but I have chosen to tear it against a ruler for a softer, torn edge.
4. Next glue the larger backing paper to the card.  Chose whichever layout you like - here are a few ideas...
I've chosen to glue it horizontally along the top.  Trim the edge then attach the mounted flower.
5. Glue along the edge of the paper and stick the ribbon to the card.  (Tip... to get the ribbon nice and straight hold it taut across the card as you lay it down, then smooth along the ribbon to ensure it is firmly stuck down.)
Trim the ends of the ribbon, I also like to add a little dot of glue to keep the ends tidy.
6. Finally add the message.  Included in the kit are 3 messages - 'On Your Anniversary', 'Congratulations' and 'On Your Wedding' so you can adapt the card for different occasions.
I chose 'On Your Anniversary' for this one.  I cut out the message and added a simple pen border before glueing to the card.
To make the tag...
1. Make another rose attached to a handmade paper backing in the same way as for the card.  Then glue to the gift tag.
2. To finish, tie the thread through the hole in the card.  I plaited the thread here as an extra touch.
The finished card and gift tag!...

Monday, 4 July 2011

Fabric Bird Card Kit ~ Tutorial

I have recently been planning some new craft kits for my Etsy supplies shop, this tutorial is for my first new kit to make a cute fabric bird notecard.

The kit contains... a card blank, envelope, paper, fabric, ribbon, button, gem, sequin, bead and template.  Although only basic supplies are needed to complete the project - (scissors, glue, pencil, a needle and thread) - I will also be using a sewing machine, craft knife, ruler and 3 different types of glue - glue stick, pva craft glue and double sided tape.
To make the card...
1. Cut out the bird body and wing template.
With the back of the fabric face-up draw around the template and cut it out. (tip: use a soft pencil)  The fabric comes with fusible interfacing already attached to make cutting and sewing easier. 
 
 2. The patterned backing paper can be arranged however you like it - covering the whole card, or with some of the card showing...
  I like to have a border around the edge, so cut the first piece to measure 7x 9cm.

 3.  Next sew the bird body onto the paper you have just cut.  Whether you choose to hand or machine stitch, use a little glue to hold the bird in place.
 I have machine stitched around the edge of my bird using a contrasting colour thread...

 4. Lay the bird's wing and button where you want them and use a needle to mark the button holes.
Sew the button on...

5. Lay the sequin on where you want the bird's eye to be and mark with the needle again.  Pass the needle up from the back, thread on the sequin then bead and pass the needle back through the sequin and same hole again.  Secure the thread on the back.

 6.  Cut the smaller piece of backing paper to size - I cut mine to 2.5x9cm. Then stick to the card (I used double sided tape and a glue stick).
 Attach the paper and bird in the same way - I have left a small border around the edge of the card.

7. Add a thin line of glue along where the backing papers join for the ribbon.
 Tip... to get the ribbon nice and straight hold it taut across the card as you lay it down, then smooth along the ribbon to ensure it is firmly stuck down.
 Trim the ends of the ribbon.  I also like to add a tiny spot of glue to keep the ends neat.

 8. Finally glue the flower gem onto the card.

 Voila! A finished fabric bird notecard...

Thursday, 3 September 2009

Puzzle Pieces...

I recently listed some new crafting supplies kits on Etsy, including a Christmas Bags of Ideas kit. As my Bags of Ideas kits contain a few puzzle pieces I thought it would be a good time to share some of my ideas for what to do with them!

I'm mainly going to show you how I paint and decorate the puzzle pieces...
I like to use acrylic paint as a base - it doesn't take too long to dry and covers the picture quite well, you can paint on either side of the puzzle piece. Depending on how thick/ thin your paint is you may need to paint more than one coat.

On this puzzle piece I have painted a coat of brown acrylic paint, left it to dry and then used Anita's 3D Dimensional Paint in metallic bronze.If you use the 3D paint fairly thickly you can use it like a glue and drop little beads and sequins into it. Alternatively, I have used PVA glue (which dries clear) to stick beads, sequins, glitter and even tiny cogs to the puzzle pieces. (I include some beads and sequins in my Bags of Ideas kits.)Another way of decorating the puzzle pieces is to glue a patterned piece of paper to the puzzle piece (using PVA glue). Then using a craft knife carefully cut around the puzzle piece. This is quite tricky - I recommend a sharp knife and a bit of patience!!


Some of my favourite pieces are the ones with beads in a variety of shapes/ sizes and colours... Before you do anything else with the pieces make sure they are completely dry!

I want to use some for jewellery, so I have varnished the back and edges then wrapped them in wire. I have also used some on greetings cards by turning the pieces into little presents (top right). Glue the puzzle piece to a piece of card just big enough to fit the piece on, then wrap wire around it to look like a ribbon and bow around a present. Use double sided tape/ PVA glue to stick it to a greetings card.

I hope this has given you a few ideas! It would be great to hear any other ideas you have too :)