Showing posts with label cardmaking. Show all posts

Saturday, 11 February 2017

Quick and Easy Watercolour Valentine's Day Card

I couldn't let Valentine's Day pass without sharing a card with you.  This one's really quick and easy to make - it's also a good excuse just to play with some watercolours!

Quick and Easy Watercolour Valentine Card by hazel fisher creations

Monday, 18 July 2016

Hot Air Balloons Birthday Card

Do you find that you go through phases of using different colours in your art or crafts?  I notice that I do - I could pretend that this is planned to look good on Instagram, but it actually happens quite subconsciously.  At the moment I'm going through a rainbow phase and want everything to look as colourful as possible!  So I used a rainbow colour palette to make this birthday card.

Hot Air Balloon handmade birthday card - Hazel Fisher CreationsI made this card with the following materials:

First, I created a splattered rainbow background on the card blank using watercolours.
I printed the hot air balloon digital stamp onto white card, cut out with a craft knife and coloured it using coloured pencils.
Then I cut a ring of white card with my Cameo cutting machine, I also used this to cut a scalloped border from white card.
I mounted the white card ring onto cloud patterned paper, as a background for the hot air balloon.
A strip of blue coloured paper was mounted behind the scalloped border strip and attached to the card blank, followed by the rainbows border strip.
I attached the white circle with the clouds paper to the card with double sided sticky foam pads, then added the balloon - again with the foam pads to add dimension to the card.
A small piece of the chevron pattern paper was glued above the borders on the right side of the card, then I wrote 'birthday wishes' by hand with a black, fine tipped pen.
Finally, I added some sequins and gems for some sparkle!

Hot Air Balloon handmade birthday card - Hazel Fisher Creations
You can find the Hot Air Balloon printables used in the project, and more, in my Etsy shop hfcSupplies.


PS. Have you seen the craft challenge I am hosting on my blog?  I have extended the deadline for entries to Thursday 21st July so you still have time to enter!  All you need to do is make something using my hot air balloon designs (some free printables are available through the challenge post!) for a chance to win a £10 coupon to my Etsy shop. Find all the details here > Craft Challenge Hot Air Balloons
Hot Air Balloon birthday card - find out how to make this card by Hazel Fisher Creations

Thursday, 16 June 2016

Craft Challenge - Hot Air Balloons and Free Printables!

UPDATE! The closing date for this challenge has been extended to Thursday 21st July!

Would you like free printables and to join in with a craft challenge with the chance of winning a prize? If the answer is yes - keep on reading!

Blog Challenge - Hot Air Balloons, free printables - join in with the challenge and create your own project with a hot air balloon theme using the free digital stamp and printable paper or something pruchased from hfcSupplies.etsy find out more on Hazel Fisher Creations' blog
I have been working on lots of new hot air balloon themed designs recently (which you may have already seen if you follow me on Facebook or Instagram), so Hot Air Balloons seemed the perfect theme for my first blog challenge!

What is the Challenge?
I would like you to create a hot air balloon themed card, scrapbook page, atc, tag or other craft project made using my printable designs.  You can use the free printables below, or something else you have purchased from my shop...

This hot air balloon digital stamp and spotty patterned paper will be available for you to download free until entries close on 18th July! Download them here. (Please follow the Terms of Use)

If you sign up to my newsletter by 22nd June you will also get 2 bonus printable patterned papers (which will be sent out in my newsletter on 23rd June)!

Hot Air Balloon Blog Challenge - free printable paper and digital stamp - Hazel Fisher Creations

The digital stamp is approx 4 inches tall (you can print it smaller too) and the spotty paper comes on a letter size sheet (8.5x11 inches), which can also be printed on A4 paper.
You can find more of my hot air balloon themed printables in my shop here.

Challenge Rules
  1. Create something on the Hot Air Balloon theme - using either the free printables above or something else you have purchased from my shop.  You can use any other supplies you like in your project.
  2. Post your entry onto your blog or online gallery and include a link back to this blog post, so that other people can join in!
  3. Enter by leaving a comment at the bottom of this post, with a link to your project - please make sure I can contact you if you are a winner - either via your blog or by leaving your email address.  The link you submit must be for your project post, not a general link to your blog.
  4. Your entry must be new and created (by you) for this challenge.
  5. Up to 3 entries per person are allowed.
  6. The deadline for entries is Monday 18th July 2016 (challenge closes at 11:59pm BST).
  7. Winners will be announced on my blog on Thursday 21st July.  There will be 2 winners:
    • 1 chosen by me - will win £10 coupon for my Etsy shop hfcSupplies
    • 1 chosen at random - will also win £10 coupon for my Etsy shop hfcSupplies
  8. By entering the challenge, you are giving me permission to share your entry as an example on my blog, website, facebook page and Pinterest board.
For full Challenge Terms and Conditions and Printables Terms of Use please see here.

For your inspiration, here are some I have made:

Birthday card made for Hot Air Balloon blog challenge on Hazel Fisher Creations - join in with the blog challenge and make your own card!
I hope that you enjoy taking part in the challenge, I can't wait to see what everyone comes up with! I will be posting all the entries here on the blog, so do check back and see what other people are making.  Share your creations on social media with #hfcblogChallenge and please share a link back to this post so more people can join in!

Happy crafting!

Friday, 25 March 2016

Happy Easter! Finger Print Chick Cards

Finger print Easter chick cards - hazelfishercreations
If you are looking for activities to do with your children over the long Easter weekend, why not try making some finger print chick cards.  They are so simple, but great fun for kids (big and small!) to make.  I remember doing this when I was little and writing this blog post was a good excuse to pretend to be a child again and get messy!

All you will need is:
  • some card or paper
  • yellow paint (poster paint would be great, I used some acrylic)
  • pen or pencil

Start by using your fingers to print little yellow blobs...
Finger print Easter chick cards - hazelfishercreations
When the paint is dry, use a pen (or pencil) to draw on eyes, a beak, wings and feet to create your little chicks...

Finger print Easter chick cards - hazelfishercreations
You can draw in other things like grass, flowers or a 'Happy Easter' message...

Finger print Easter chick cards - hazelfishercreations
Happy Easter everyone, whatever you are doing I hope you have a lovely weekend!

Finger print Easter chick cards - hazelfishercreations

Finger print Easter chick cards - hazelfishercreations

Friday, 11 March 2016

Penny Slider Butterfly Birthday Card

Penny Slider Butterfly Birthday Card hazelfishercreations
It was my sister's birthday recently, which provided me with a good excuse to try out a new paper crafting technique on her birthday card!  Inspired by this penny slider card on PaperCraft Inspirations website, I decided to try making one for myself.  I had never made a penny slider card before, but it's quite straightforward to make one and they are really effective and fun too.  I will definitely be trying out this technique again!

For my card I used:
a white card blank
scrapbooking papers from DCWV's Citrus stack
the butterflies are my own designs, taken from my Butterflies Digital Papers set
lime green 3mm wide satin ribbon
rub-on happy birthday message

As this card involves moving parts I thought it was also the perfect opportunity to try making a (very) quick little video.  One of my goals/ dreams is to make craft videos to share on Youtube.  So this is me taking the first step in learning how to do this!  Have you made videos for Youtube? Any tips are welcome!

Monday, 7 March 2016

Mother's Day Card - Floral Heart Digital Stamp

Mother's Day Card floral heart design with digital stamp by hazelfishercreations
Yesterday was Mother's Day here in the UK, so I thought I would share a photo of the card I made for my Mum.
I used the floral heart design from my 'Decorative Hearts' set of digital stamps (available from my Etsy shop).  I printed the heart onto white card and coloured it using watercolour pencils and watercolour paints.  By using shading, I have given the heart a 3-dimensional appearance.  (This design would also work well with decoupage, if you printed and coloured multiple copies of the heart.)
I cut the heart out and attached it to a white, hammer textured card blank using double sided sticky foam pads.  Finally, I hand wrote the message 'Happy Mother's Day' on the front of the card using a black PITT artist pen.


Decorative Hearts digital stamp set available from hfcSupplies on Etsy

Friday, 12 February 2016

'I think you're purr-fect' Valentine's Card

I think your're Purr-fect cat Valentine's Day card, made with digital stamps and scrapbooking papers by hazelfishercreations
Only 2 more days until Valentine's Day, so I'm just in time to show you this Valentine's card project! It's made with my new 'I think you're purr-fect!' set of digital stamps and Watercolour hearts scrapbooking papers (see more about these below), both of which are available as Instant Download from Etsy. Printables are great for last minute projects because you can download and print them straight away, so if you've not got your Valentine a card yet you still have time to make one!

Materials used:

1.  Print the scrapbooking paper background and the cats digital stamp onto white paper or card.

To do this, I first set up a document the size of my card in my photo editing program (I use Photoplus).  I copied and pasted in the scrapbooking paper background.
I then copied and pasted in the 'I think you're purr-fect' text digital stamp (.png format with transparent background) as a new layer.  The stamp is larger than my card, so I reduced it in size and positioned it to where I wanted it to print on the background.
I then pasted the cat image stamp and also resized this to fit my card.
Next, I opened a new document the size of the paper I would be printing on (A4) and copied in the background with the text stamp as one image and the cats separately, so it looked like this... 

I think your're Purr-fect cat Valentine's Day card tutorial hazelfishercreations
2.  Cut out the scrapbooking paper background and glue to your card blank.

3.  Cut out the cats image as a square, round the corners with a corner punch.

4.  Colour the cats image - I used watercolour pencils and paints.

5.  Attach the cats image to the front of your card with double-sided sticky foam pads.


About the papers used in this project...
I used the green and white hearts patterned paper from my 'Watercolour Hearts Blue & Green' set of scrapbooking papers and my 'I think you're purr-fect' set of digital stamps.  Both of these are available to buy from my Etsy shop - I also have more heart themed scrapbooking papers in other colours and other Valentine themed digital stamps.

Valentine scrapbooking papers and I think you're purr-fect digital stamps by hazelfishercreations

Thursday, 24 September 2015

Halloween Card

On Tuesday I released some new Halloween themed printables; I will be sharing some different ideas over the next few weeks on how you could use them - first up is this Halloween card...

Halloween card hazelfishercreations
Materials used in the card:
144x144mm white card blank
orange paper
black and white card
Halloween night sky scrapbooking paper (from this set)
Witch, cat and 'Trick or Treat?' digital stamps (from this set)
watercolour pencils
black and orange baker's twine
double-sided sticky foam pads
craft glue / double sided sticky tape
silver glitter glue
silver gel pen
black pen
hole punch

How I made the card...
First I prepared the digital stamps for printing; I layered the cat digital stamp so it slightly overlapped the witch image and printed them onto white card.  I decided to test out my Silhouette Cameo cutting machine's print and cut feature and was very impressed with how well it cut around the girl and cat - I'll be sharing a blog post about this another time!  You could cut around the image with scissors or a craft knife too.  The girl and cat were then coloured with watercolour pencils.

I cut a square of the night sky scrapbook paper, smaller than the card blank and mounted it on orange paper, then glued these to the front of the card.

Halloween card close up 2 hazelfishercreations
The 'Trick or Treat?' word stamp was printed onto white card.  This was then mounted onto orange paper and I drew a striped border to match the baker's twine using a black drawing pen.  I threaded baker's twine through a punched hole before tying the twine around the card.

Using my Cameo I cut a bat silhouette from black card, you could also cut this by hand.  Drawing lightly around the very edge of the bat with silver gel pen helped it to stand out from the dark background paper.

Halloween card close up 1 hazelfishercreations
I attached the witch, bat and 'Trick or Treat?' tag to the card with double-sided foam pads to add dimension.  Finally, I added a little silver glitter glue to the some of the stars on the background paper.

Friday, 15 May 2015

How to Make: 'Celebrate' Citrus Cake Card using the Silhouette Cameo to cut text

Celebrate Citrus Cake Card diy tutorial hazel fisher creations 1b
I am loving bright citrus colours at the moment – like in the colour palette I made from my birthday flowers.  I used this palette as inspiration for this card which is made with a patterned scrapbooking paper and digital stamp which I designed.  This card was also a good opportunity to make my first tutorial using my Silhouette Cameo cutting machine which I introduced earlier this week – I used it to cut the text on this card.  If you don't have a cutting machine you could cut the text by hand, print the word onto paper and stick to your card or hand draw it directly onto the card.


To make this card you will need:
  • White A6 card blank
  • Printable orange chevron patterned paper (see end of post)
  • Printable cupcake with a candle digital stamp (see end of post)
  • white card and paper
  • Coloured pencils and/or pens
  • 3x gems (I used pink and yellow round 5mm gems)
  • 3mm wide satin ribbon (I used lime green)
  • glitter glue
  • glue, double sided tape and foam pads
  • scissors, craft knife and cutting machine
  • Silhouette Cameo 2 cutting machine and Silhouette Studio software
  • Computer and home printer

1.  First you will need to print the patterned scrapbooking paper onto white paper and cupcake digital stamp onto white card.

2.  Cut the word 'Celebrate' with the Silhouette Cameo, using Silhouette Studio software:

Type the word 'Celebrate' (I used the font ‘Lobster’, which is free to download if you don’t already have it installed on your computer.)   I adjusted the size of the word so that the letters were approximately 3/4 inch tall.

Celebrate Citrus Cake Card diy tutorial silhouette cameo hazel fisher creations 3

You will see that some of the letters overlap. We just want to cut the outline, not where the letters overlap, so in 'Cut Settings', select 'Cut Edge'.

Celebrate Citrus Cake Card diy tutorial silhouette cameo hazel fisher creations 4

I cut the word from white card, with the ratchet blade set to no.2.  (I recommend doing a test cut first to check which setting you need).  After cutting the word I coloured it with pink felt tip pen – you could just cut it from pink card!

3. Glue the word ‘Celebrate’ onto the card blank.  Then stick the orange patterned background paper onto the card blank – lining it up with the word ‘Celebrate’, leaving a small gap between the word and background paper.  Trim the background paper to the size of the card.

4. Colour the cupcake (I used coloured pencils) then cut out leaving a small border around the edge.

5. Glue the ribbon along the edge of the orange patterned paper.  Glue 3 gems below the word ‘Celebrate’.  Then attach the cupcake to the card using foam pads.

6. Finally add some sparkle with glitter glue on the cupcake!

Happy crafting!

Celebrate Citrus Cake Card diy tutorial hazel fisher creations 4
About the papers used in this project: The printable scrapbooking paper and digital stamp I used in this card are both my own designs and are available to buy from my Etsy shop – the orange chevron paper is from the Citrus set of scrapbooking papers and the cupcake is from my Cupcakes and Roses set of digital stamps.

Celebrate Citrus Cake Card diy tutorial hazel fisher creations 2

Tuesday, 15 April 2014

Some recent makes…

2014 April 15 Mollie Makes kit dogI’ve been a subscriber to the Mollie Makes magazine for a couple of years now and have quite a collection of the little kits which come free with each issue.  I love the mix of craft projects, articles and inspiration in the magazines and it’s always nice to get a new craft project to try out each month (even though it usually takes me a while to get around to making them!).  This retro Dachshund is from issue 31 and was designed by Jane Foster.  She makes lovely brightly coloured screen prints inspired by Scandinavian design.  This dog was something nice and simple to stitch in front of the tv one evening.  Just to make it slightly different I decided to add some dried lavender to the stuffing, so it could be used to scent drawers when not sitting on my desk!

I’ve also been making a few handmade cards…
2014 April 15 handmade cards steampunk birthday car butterfly and flower mothers dayThe Steampunk card was for my Dad’s birthday and was made with stamps from the Hexley transport set.  I used a copper coloured inkpad with the stamps and embossing powder on everything except the background pattern.  It’s a long time since I tried using embossing powder with stamps, and I wasn’t very successful with it before but was really pleased with how it worked this time.

I made the other card for Mother’s Day with layered punched and hand cut flowers, leaves and a butterfly from my Butterflies collage sheet.  I also added little gems, sequins and some cotton thread glued in swirls around the flowers.  It doesn’t take too long to cut everything out but I’ve been admiring the Brother CutNScan which would make cutting shapes for cards like these soo quick and easy!

Wednesday, 22 January 2014

Inspiration for using Inky Doodles stamps – Create and Craft tv show!

The first two sets of Steampunk stamps have now been added to my shop!  They will be officially launched on Saturday on the Create and Craft show (see the bottom of this post for details), when Sarah from Inky Doodles will be sharing some ideas on using the stamps.  I’m so excited about the show – can’t believe my designs will be on the tv!!
2014Jan22 steampunk stamps inky doodles card samples 3I have been playing with the stamps and made a few samples which will be on the show too.  Here’s a little about the things I made in the photo above…

Gift Box (made with stamps from both the Clockwork Bird and Transport sets) – I stamped clock hands and cogs all over the plain box and coloured the hands with watercolours.  I then used soft artist pastels to colour the box all over (smudging the colour with cotton wool).  The pocket watch is from the Transport set and was attached to the box with baker’s twine and a mini brad.

Chaffinch Birthday Card – the background to this card was made with one of the corner stamps from the Bird stamp set and a cog stamp.  This card was also embellished with ribbon and 3 little gems.

Kingfisher Tag – I coloured the Kingfisher stamp with watercolours on this tag.  The background is stamped with key and cog stamps and I used one of my favourite techniques – wiping a gold ink pad around the edge of the tag – to give a distressed effect.  Finally it was finished off with some little gems.

2014Jan22 steampunk stamps inky doodles card samples 2Sarah has designed some complimentary background stamps and stencils to go with the designs I did for her.  I used her A6 Checkered Background stamp and A6 Circle Gear Background stamp along with my Hexley Transport set to make this card.  Everything on this card was stamped onto white card then coloured with artist soft pastels.  I love adding colours with the pastels and think it adds so much depth and texture compared to stamping on plain coloured paper.  I’m so glad that I finally found a use for my pastels – they have been sitting in the bottom of a drawer for years, waiting for me to think of something to do with them!
2014Jan22 steampunk stamps inky doodles card samples 1This set of stamps (Time Flies) was also designed by Sarah – I like how the Steampunk theme can be given a bit of a girly twist with the clockwork butterfly and dragonfly.  Again I coloured this card with the soft pastels and added some pink and purple gems for a bit of sparkle.  You can’t see it from this photo, but the card blank I used has a slight shimmer which still shows through the stamped background and pastels.

~ * ~ * ~ * ~
The Clockwork Birds and Hexley Transport sets of stamps can be seen in my shop here.

Sarah’s other stamps and stencils are available from the Inky Doodles website.  She also posts other ideas on how to use the stamps on her facebook page.

Don’t forget to watch the Create and Craft Show on Saturday!  It’s on Sky channel 671, Freeview 36 or Freesat 813 at 11am 25th January

Thursday, 23 May 2013

Steampunk Stamps

I’ve been playing around with my rubber stamp samples from Queen Kat Designs and made this card…

2013May23 rubber stamp steampunk card clockwork blackbird 1I used the Clockwork Blackbird stamp and lightly coloured it with pencil and pen.  The ‘suede’ coloured card blank is made from recycled card and I have coloured the edges with a gold ink pad.  This is one of my favourite techniques at the moment – I coloured the edges of the scalloped circle and cream card strip (across the bottom of the card) with the gold ink pad too.
I also used some of the papers from my Steampunk scrapbooking paper set.  The mini spotty buttons and bakers twine are from my Steampunk embellishment pack.

2013May23 rubber stamp steampunk card clockwork blackbird 3The Clockwork Blackbird stamp comes with the Clockwork Robin – you can buy these stamps and more of my designs from Queen Kat Designs.  The stamps are laser etched and come unmounted – so don’t take up much space!  As you can see from the bird above, the stamps are really detailed.  I'll be making some more samples up with my other stamp designs - so look out for those on the blog soon!

2013May23 rubber stamp steampunk card clockwork blackbird 2

Friday, 17 May 2013

New Paper Crafting Kits

I’ve been a bit quiet on the blog recently, the reason is I have been working on some exciting new products and I’m finally able to show you what I have been doing for the last couple of weeks!  I am expanding the craft supplies section of my shop and combining my designs for scrapbooking papers with some gorgeous new supplies like ribbons, bakers twine and buttons.
There are 3 new collections of kits; ‘London Calling’, ‘Cupcakes and Roses’ and ‘Steampunk’.  Each theme will have a card making kit and embellishment pack.  I will also be selling separate sets of things like baker’s twine.  If these prove popular I will be adding more themes and colours too.

London Calling Kit etsy 5 cards ribbon buttons paperThe London / British themed card making kit contains 5 cards and envelopes, printed patterned papers, collage sheet and embellishments such as ribbon, buttons and beads.  (I love the bunting grosgrain ribbon in this set!)
London Calling embellishment pack 1 buttons ribbon beads bradsThe embellishment pack contains the same embellishments in red, white and blue as the card making kit but more of everything – longer lengths of ribbon, more buttons, beads, brads…


Cupcakes and Roses cardmaking kit 6 paper card buttons beads embellishmentsThis pretty Cupcakes and Roses themed kit has blank cards, patterned rose paper, hot pink stripy buttons, pastel green and pink bakers twine and more…
Cupcakes and Roses embellishment pack 2 buttons ribbon brads beadsThe Cupcakes and Roses embellishment pack contains more ribbon, buttons, beads etc than in the card making kit.  Each of the embellishment packs contains fabric covered brads which I have made using different patterned new and vintage fabrics.


Steampunk cardmaking kit 5 cards paper buttons bakers twineThe Steampunk card making kit contains card blanks made from recycled card, brown kraft envelopes, patterned papers and collage sheets featuring my steampunk illustrations and coordinating embellishments.
Steampunk embellishment pack 3 bakers twine beads buttonsInside the Steampunk embellishment pack are 4 different colours of baker’s twine, satin ribbon, mini spotty buttons, beads and more…

10m Bakers Twine 5 bright colours blue purple pink orange yellow 1I’m also adding other craft supplies to my shop like this card of baker’s twine in 5 bright colours.
What do you think of my new supplies?  Is there anything else you would like to see me stock in my shop?

~*~ You can see all the craft supplies and printable papers I sell in my Etsy shop: www.hfcSupplies.etsy.com

Wednesday, 1 May 2013

Handmade Birthday Cards

Spring is a busy time for birthdays and other card giving occasions in my house, so I thought I would share a couple of cards I made recently.
2013may01 handmade fish aquarium birthday card2
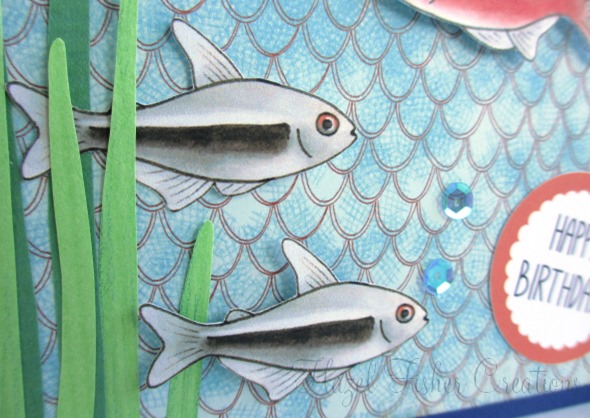
This fishy card was for my Dad’s birthday.  I used some backing paper from my set of Fish scrapbooking papers and fish from my collage sheet printed onto card.  The vallis leaves were cut from coloured paper and I made the design more 3D by sticking the fish on with foam pads.  Finally, for a bit of sparkle I used some translucent sequins…
2013may01 handmade fish aquarium birthday card
I’ve made a few variations of this butterfly card recently (this one was for my sister’s birthday)…
2013Mar04 Butterfly birthday cardI love the pearlescent pea green card blank I used for this design, unfortunately it’s a discontinued colour so I won’t be able to get any more :(  I printed one of my butterfly patterned papers onto sandstone coloured card and the butterflies and message were printed on card from my butterfly collage sheet.  After cutting the patterned background to size I coloured the edge with a gold inkpad.  The large butterfly was attached with foam pads and the small butterfly glued to the card along its body, with the wings slightly folded up for a 3D effect.  I also used some pretty yellow and blue gems to finish the card.

Have you bought any of the printables from my shop to use in your cardmaking or craft projects?  If you have I would love to see what you make with them!  Leave a link to your photos in the comments below :)

Tuesday, 30 April 2013

New sets of cards now in stock!

2013april30 new card in stockSets of white cards with Kraft envelopes are probably the most popular sets of cards in my shop, but I love to receive a stack of coloured cards too!  I’ve just had a new order of card and paper so have plenty of different colours in stock.  A couple of the colours I used to sell are no longer available from my supplier so I’ve had to change some of the colour schemes a little, I’ve also introduced some new colour schemes (like the pearly mermaid collection).  I can make custom sets too – so if you are looking for different quantities or colour combinations not already listed in my shop please contact me.

These are the colours of card I currently stock (numbers 22-30 are new)…
April 2013 Colours of Card in stock