I've had the photos for this zip pouch sitting on my hard drive for a few weeks, waiting to be edited and shared. I thought now would be a good time to share the project as it is quite a quick make and would be perfect if you're wanting to make some last minute Christmas presents! In this tutorial I will show you how to sew this pouch with a zip and lining; it's just the right size for pens, pencils, small craft projects or make-up. You can use the same technique though to make pouches of different sizes to fit anything you like - for example smaller ones as coin purses.
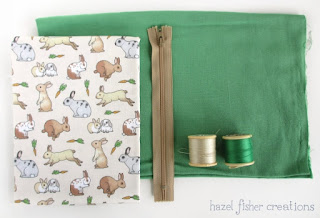
The materials I used to sew this zip pouch:
Rabbits on Kona Cotton Fabric (available from my Spoonflower store)
Green fabric for the lining
7 inch zip
Cotton thread

First cut your fabric to size, slightly wider than the zip and allowing a 5/8 inch seam allowance on all sides. For my pouch I cut 2 pieces of the Rabbits fabric and 2 pieces of the green lining, each measured approx. 8 1/8 x 5 1/2 inches.

Lay a piece of the outer fabric face up, followed by the zip face down, then a piece of lining.

Pin and sew, so your piece looks like this...

Repeat for the other side of the zip with the second piece of outer and lining fabrics. Open out and press your seams, then top stitch for a neat finish around the zip...


Now open it out so that the lining pieces are facing each other and the outer rabbit pieces are facing each other. Make sure the zip is open (so you can turn it out the right way again!) and facing into the lining (this gives a neater finish when it is turned out the right way again).
The materials I used to sew this zip pouch:
Rabbits on Kona Cotton Fabric (available from my Spoonflower store)
Green fabric for the lining
7 inch zip
Cotton thread

First cut your fabric to size, slightly wider than the zip and allowing a 5/8 inch seam allowance on all sides. For my pouch I cut 2 pieces of the Rabbits fabric and 2 pieces of the green lining, each measured approx. 8 1/8 x 5 1/2 inches.

Lay a piece of the outer fabric face up, followed by the zip face down, then a piece of lining.

Pin and sew, so your piece looks like this...

Repeat for the other side of the zip with the second piece of outer and lining fabrics. Open out and press your seams, then top stitch for a neat finish around the zip...


Now open it out so that the lining pieces are facing each other and the outer rabbit pieces are facing each other. Make sure the zip is open (so you can turn it out the right way again!) and facing into the lining (this gives a neater finish when it is turned out the right way again).


No comments:
Post a Comment