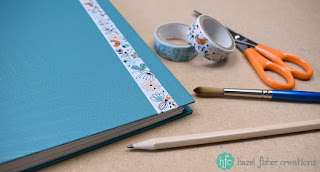
I have been making my own little books and sketchbooks for years and there are so many different techniques to try. Once you learn the basics you will find that you can use your creativity to make each book totally unique! Back in January I shared a tutorial on how to make really simple matchbook notebooks and today I will show you how to make something a little more complicated, using a stitched technique - but once you get the hang of it you can use it to make your own sketchbooks, notebooks, journals and more!
paper for the pages (I used 140gsm cartridge paper)
strong thread (I used Gutermann's extra strong polyester thread)
pencil
ruler
pin
needle
craft knife and cutting mat
greyboard
linen / cotton fabric (for the spine)
decorative paper (for the cover - I used wallpaper)
PVA glue
1. Start by cutting your paper for the pages. Cut all pages to the same size. My paper was approximately A3 in size - so the finished sketchbook will be A4. But you can make books any size you like!
2. Split your paper into sections - I used 4 sheets per section, with 5 sections in total. Fold each section in half.

3. Take 1 section, open it out and mark holes, for sewing along the centre fold using a pencil. Repeat this for all sections. You need an even number of holes, spaced the same for each section - so measure carefully! These are the measurements I used for my pencil marks: measure from one end and mark at 1 inch, 2 inches, 3.1 inches, 4.1 inches and 5.2 inches. Repeat, measuring from the other side - so there are 10 dots.
4. Use a sharp pin (or an awl if you have one) to make holes through all sheets in each section, through your pencil dots.

5. Tie a knot in your thread and start sewing from the outside of the section to the inside, through your first hole.
6. See image 6 for my numbered diagram of the holes - sew in this pattern: up hole 2, down hole 3, up hole 4, down hole 5, up hole 6, down hole 7, up hole 8, down hole 9 and up hole 10.
Tip! Remember to keep pulling your thread tight as you go along, for a neat finish.
7. Now start to join the second section to the first. Go down hole 10 in the second section, up hole 9, down hole 9 of the first section, up hole 10, down hole 10 of the second section, up hole 9 then down hole 8 of the second section.
8. Continue up hole 7 in the second section, down hole 7 in the first section, up hole 8, down hole 8 in the second section, up hole 7 and down hole 6 in the second section. Continue in this pattern until the first two sections are joined together.
9. It should now look like picture 9. It might sound complicated, but it's easier once you try it for yourself and see the pattern working.

10. Repeat the same stitching pattern to join section 3 to section 2 and so on, until all sections are joined together. Tie a knot in the thread to finish off.
11. The spine of your book should look like image no.11. Make sure that any time you need to start or finish the thread, the knot is on the outside.
12. Now you're ready to make the cover. Start by trimming the edge of your book so the pages are even.
13. Cut 2 pieces of greyboard, slightly larger than the size of your book.

14. Cover the greyboard in your decorative paper (I used some bargain wallpaper I bought for £1 ages ago). Also trim a piece of fabric for the spine, slightly longer than the book and wider than the spine. I used a scrap of cream fabric which I think is linen and works well for this.
15. Fold over the ends of the fabric, so it is now the same length as your book and the raw edges will be hidden inside. Glue the fabric along one side at a time. I don't glue the actual spine, but along the edge of the page close to the spine. Leave to dry.
16. Glue the covers to the front and back pages. Tip! - Leave to dry under a heavy book or board.
Finally I decorated the front cover of my book with some pretty tape...

I hope that you enjoyed this tutorial and feel inspired to try making some books yourself. If you share your makes on social media, use the hashtag #myhfcmakes - I would love to see them! (You can find me on Instagram and Facebook)


So so helpful. Thanks so much for sharing
ReplyDelete